Here’s a few straight-to-the-point pointers for Marvel Champions LCG villains
This blog is meant to serve as a beginner’s guide through Galaxy’s Most Wanted

Rhino
Key tech cards: Under Surveillance, treachery cancellation, tough
Rhino is a very straight-forward villain, but he can trick people up, especially in solo play. There are two main things you want to watch for with Rhino: threating out, and charge.
Although it’s a bit counterintuitive for new players, you really don’t want to go into alter-ego often with Rhino. Unlike a lot of other villains (and unlike everyone else in the core set), Rhino only has one main scheme stage. If you threat out, you lose. This can happen often if he draws Advance and gains a triple-boost; even if you’re safely in hero form.
Because of that looming, instant loss condition, you’ll want to make sure you can keep the main scheme down at all times. Alternatively, you can bring Justice, as several key Justice cards can help crush the main scheme (Under Surveillance, Counterintelligence), allowing you to entirely focus on Rhino while threat is in the rear view mirror.
Charge is the other big bad card. This grants Rhino overkill, one of the most devastating effects in the game. Overkill goes through chump blocking (and splashes big damage onto your hero), so you really want a way to deal with it if it comes out. High defense, damage mitigation (like Wiggle Room in Ms. Marvel), or tough status cards are options.

Klaw
Key tech cards: Stuns [Mockingbird ally], low-cost allies, minion management
Klaw is one a huge jump up from Rhino in the core set.
If you’re playing on expert, you’re starting with two side schemes and a minion in play. Insane! How tough that minion is may depend on your modular set. Hopefully, you’ll get a Weapons Runner, which does not surge because it wasn’t revealed, it was put into play.
In any case, you need to be able to deal with that minion right away, especially if it has guard. Klaw is interesting in that he can kind of do it all. He can scheme. He can hit you with crazy-high damage if he draws into high boosts. So to shut him down, you’ll want to rely heavily on stuns.
By stunning Klaw you are taking away his main weapon: double boost cards. Just note that you may have to deal with an attack from him via the encounter deck, as Assault or Gang-Up can trigger another attack. In that case, allies are wonderful tech against Klaw, as he can double-triple-boost into eight damage in Stage III and not put a dent into your hero; so long as you chump block.

Ultron
Key tech cards: Stuns, threat mitigation for stage 2B, retaliate
Ultron was one of the most unique encounters in the first year of the game. He also benefits from having the highest single health pool at the time of his release.
Because of this, you will need to rush down Ultron somewhat. You may decide to keep him at Stage II in expert before you push to III (depending on your strategy), but ultimately, you do need to kill him before he starts overwhelming you with drones.
Stun tech works great for stopping Ultron II from spawning too many minions. But using powers like Jennifer Walters’ alter-ego ability, Great Responsibility, and Counterintelligence can actually stop Ultron 2B from triggering. That’s one less drone you need to worry about.
Retaliate is excellent drone tech, as are AOE (area-of-effect) abilities like Lightning Strike. Out of the core set, Black Panther is a great tool for cutting down drones. He can face-tank them and kill them instantly (non-upgraded), and use allies to take Ultron hits.
Risky Business
Key tech cards: Burst damage mitigation, high-reward setup cards
Risky Business is often cited as one of the easiest scenarios in the game, and there’s a reason for that.
Generally, you want to avoid flipping Norman to the Green Goblin side unless you are ready. Setup to your heart’s content, keep the Criminal Enterprise tokens low (preferably hovering around one), then when you’re good to go, chip damage him, have him go Green Goblin form, then let it rip with the perfect hand and setup.
If you keep flipping Norman to Goblin constantly, you’re going to have a bad time dealing with a ton of indirect damage. You don’t want to do that. Ideally, you’ll flip Norman twice all game – once to get him to the next stage, the next to kill him.
For the most part, you won’t be flipping to alter-ego when Norman is active, so you won’t be schemed out of stage 1B. This leaves you plenty of time to take null “attacks” from Norman as you stay in hero form all game.
As a final tip, remember that indirect damage from Stages I-II of Green Goblin can be assigned to any of your characters. It does not need to exclusively go to your hero.

Mutagen
Key tech cards: Anything high tempo that doesn’t require setup, treachery cancellation
Mutagen expert, on the flipside, is cited as one of the toughest scenarios to date.
This is because on Stage II, Green Goblin instantly deals two encounter cards to each player. In other words, on expert, you’re resolving three encounter cards turn one. As you might expect, tempo is important. The concept of tempo refers to how quickly you are outpacing the villain’s turn. For Mutagen, it’s key that you don’t waste multiple turns setting up.
You simply do not have time to have the villain play passively, because they are firing on all cylinders turn one. Because of this, hitting Goblin immediately with damage will help you slowly chip him down. Heroes like Spider-Man or Doctor Strange, which have treachery cancellations, can also assist with early tempo losses that might stem from those three starting cards.
Finally, you will need something to deal with those three-health guard minions. Cheap three-damage solutions (allies included, who can block for you after) are key. You’ll want to use the rest of your hand to swing at Goblin.
A final tip: The “damages You” in Green Goblin’s forced response only refers to the hero. If you block with an ally, it does not resolve.

Wrecking Crew
Key tech cards: Burst damage
Everyone has a different order for killing the Wrecking Crew, but mine usually involves taking out Wrecker and Thunderball quickly, then Piledriver and Bulldozer.
Here’s the big “cheat” for Wrecking Crew. You are always in control of who the active villain is, even if the encounter deck “changes it.” This is the secret. All you need to do is have the villains that you want to be the two potential “main” choices throttled at the lowest and highest threat on their schemes. That’s it.
With practice, you can completely avoid having Bulldozer ever activate once in an entire game, to avoid his overkill ability. You can also wait to take out Piledriver and avoid having him whittle down your upgrades/supports, and avoid taking slow, painful retaliate damage. As a general rule, the active villain will be the one that has the highest threat. However, ties are broken by the player, and all the other “random” encounter card changes involve “the least threat.”
Once you have this down, the encounter is a cinch. All you need to add is burst damage to potentially kill a Wrecking Crew member on your first turn, and you’re good to go.
Crossbones
Key tech cards: Indirect damage soak/burst damage mitigation
Crossbones isn’t a super tough villain, but he’s one of the most fun. And he’s very spiky. He’s a lot like Rhino in that way, and even has a charge-like secret weapon.
The biggest problem card in Crossbones’ arsenal is Full Auto. There are two copies in the deck, and when you’re in hero form, he can hose you down for a ton of indirect damage. If you don’t have ways to mitigate it and/or allies out, you can die outright.
If you can get Full Auto and Machine Gun damage under control, you’ll eventually best Crossbones. The rest of his kit is very straight-forward, and by default, his minions are very easy core set threats. His low health also ensures that you should be able to take him out before he uses several of his own tutor cards to kit himself out with goodies.
Focus first on mitigation and second on damage, and you’ll burn Crossbones before he burns you.
Absorbing Man
Key tech cards: Low-cost cards, Under Surveillance
Absorbing Man’s kit has two main faults: a very high threat threshold main scheme (1B), and the limitation of only having one environment out at a time. 12 threat is a very high ceiling, so you don’t necessarily need big threat mitigation cards to keep him down. Environments are also very easy to handle, as he generally will attack with a pre-arranged, already setup environment.
For instance, if stone is out, he’ll place threat on the main scheme, and the stone environment will allow him to heal. That’s it. You know what’s coming, so outside of a new environment surge into an assault, Absorbing Man is very predictable.
Having a well-balanced kit that can deal with damage and threat is key, so you can adapt to his snail-pace environment shifts.
A final tip: using Under Surveillance on any single-stage main scheme will help wonders. If you’re Justice, bring just one copy of it for more leeway.

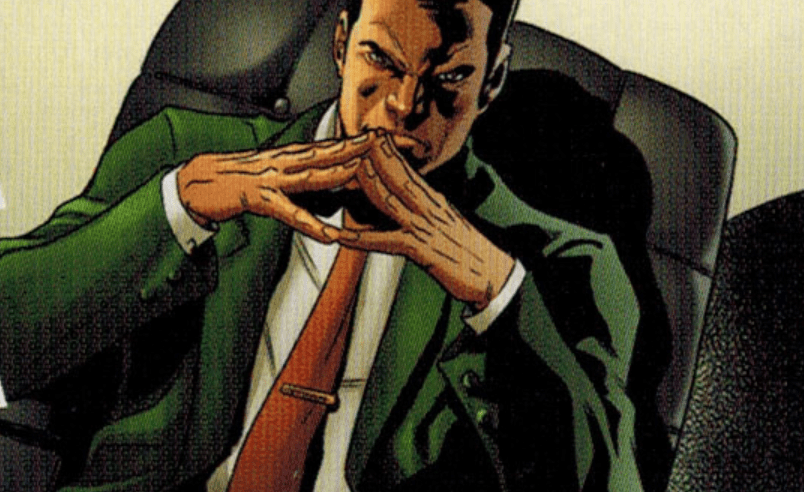
Taskmaster
Key tech cards: Healing, hero-centric builds that don’t rely on alter-ego
Taskmaster is another straight-forward villain that has one main scheme stage.
To really lay into Taskmaster, stay in hero form all game and watch as his main villain power goes to waste. Use allies to help you accomplish this while you put in small packets of damage. If you’re trying to take his Photographic Reflexes away, ping him for one measly damage, take one back, then discard it. Easy.
The only heroes that might have issues with Taskmaster are Ant-Man, or alter-ego heavy heroes like Ms. Marvel or She-Hulk. They like to flip a lot, so going back and forth to hero can make you take unnecessary damage.
A final tip (hey, it’s just like Absorbing Man!): using Under Surveillance on any single-stage main scheme will help wonders. If you’re Justice, bring just one copy of it for more leeway.
Zola
Key tech cards: Cards that provide packets of 3-5 damage
Zola can be brutal for multiple reasons. Like Klaw and Mutagen he has a very taxing setup, forcing you to deal with multiple things at once. If you can live without your signature ally (for some heroes this is a boon), you can ignore Hydra Prison.
Minions are the main thing you want to watch out for. and in the base scenario, they range from 3-5 health. Make sure you don’t get caught with damage values that aren’t enough to take out a minion, and build your deck accordingly.
Zola’s baked-in retaliate is also a major issue for ally swarm decks. To mitigate this, use allies to thwart or take down minions, and use your hero to really hit Zola hard. That way your swarm army can stay up to take hits from Zola directly. This is especially key because Zola can draw into Assault, Gang-Up, and Mind Ray: all of which dish out an extra attack.

Red Skull
Key tech cards: Low-cost burst thwart cards like Clear the Area
Without the campaign upgrades to help you, and with high-tempo modular sets involved, Red Skull can be a beast. But like all villains, he can be beaten.
You’ll want to bring lots of thwart for Red Skull, so you can take out one side scheme (at least) per turn. In this own set, that averages around three threat per player. Many heroes can handle this without excessive setup, like Quicksilver.
Low cost-curves are key here, because you may need to deal with a minion, deal damage to Red Skull, thwart a side or main scheme, and remove an upgrade in the same turn. Oddly enough you can “tech” against Red Skull by bringing easier modular sets. Sets that don’t tutor out additional threats are a good way to learn the encounter.

Kang
Key tech cards: Burst cards, setup cards (more on that in a moment)
It seems antithetical to ask players to build for both quick and slow tempo in their decks, but hear me out.
Kang is a very tricky villain in that he requires you to immediately deal with him, then he has a lull period, then he gets back to business. You’ll need some burst to get him out of stage one quickly before the board state gets too crazy.
While you’re in stage two, especially in solo play, you can relax. The only negative impact you’ll have when “threating out” in the second stage of Kang is an extra copy of Kang’s Dominion. In solo, that’s just three threat and an encounter card in exchange for one to three (or more) turns of setup. In multiplayer with a full board, one Kang’s Dominion is 12 threat. If just one person gets a huge setup out of it, it’s worth it.
You’ll need a decent amount of buildup for stage three too. Kang III can dish out damage and threat, while commanding a hefty hitpoint value. If you have minions, side schemes, and obligations piling up, you may never defeat him. By default you don’t need heavy minion tech (his Macrobots have four health by the way) for this one, depending on the modular set you chose.
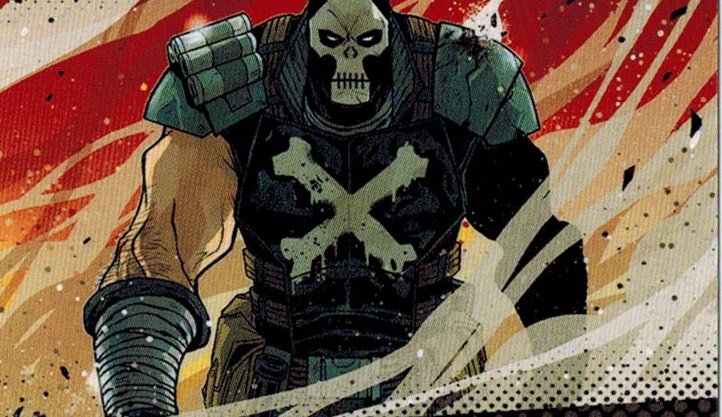
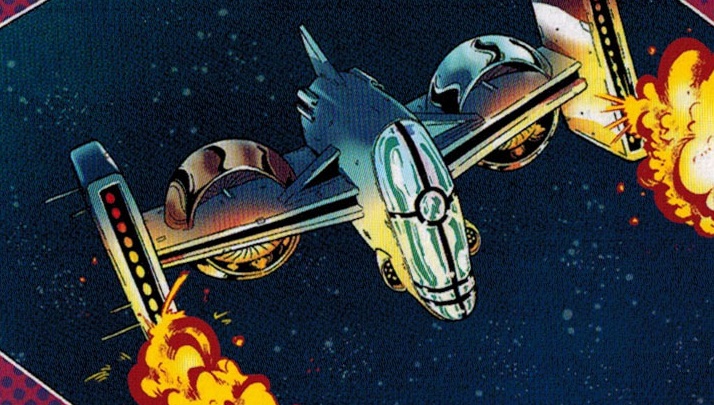
Drang

Key tech cards: Stun and confuse, to prevent Drang from adding barrage counters
Galaxy’s Most Wanted brings the heat, and Drang is no pushover.
Drang can dish out a lot of damage if you let him, but he doesn’t have that many ways to gain access to overkill in his base kit. Instead, Drang overwhelms you with “barrage counters,” which charge up his ship and blast every player with two indirect damage after he acquires four counters.
Think of this like a soft timer on the scenario. You need to take him down at a decent pace, but not too quickly, because moving him into Stage III before you’re ready for it can be disastrous. The Badoon set itself doesn’t throw too many wrinkles at you, but thwarting is paramount, even in bursts. Unlike a lot of other scenarios, it’s totally OK to “fail” Stage 1B and drop to Stage 2B if you need a breather. There isn’t a huge penalty.
If you’re starting with Drang II on expert, try and get rid of his spear as soon as possible. You really want to remove stalwart, so that you can stun or confuse him to keep the heat off. This is especially the case for Drang III, as any activation will charge up his ship. Replacing that entire process is a great way to keep his ship at bay: so make sure when you flip Drang to III, you’re ready! Those barrage counters can add up really fast.

The Collector: Infiltrate the Museum
Key tech cards: Beefy permanents that aren’t meant to be sacrificed, heavy thwart to pay for dropping to alter-ego to prevent chumping allies into the collection
Infiltrate the Museum is one of the most contentious scenarios in the Galaxy’s Most Wanted box, but where there’s a will, there’s a way.
Here’s the main gimmick: Collector will “steal” in play cards from you and his own encounter deck (like allies, upgrades, or even minions). If the collection grows to five per player cards, you auto-lose. No pressure!
As you can imagine, this is monumentally easier to build for in standalone play. First off you want to make sure you aren’t taking too many low HP allies. Now this can be tough to handle in the campaign — where you can’t change your deck on expert mode — but generally you want a decent spread of capable allies if at all possible. Make sure that when you activate them you aren’t always just chump blocking with them, or activating them down to their very last consequential damage.
Instead, keep your allies alive and “save” them to chump with in emergencies, or when the collection is low. You’ll want to face-tank hits from the Collector, or consider taking Endurance (x1 copy) in a campaign to allow you some breathing room. Swapping to AE to take a breather (especially when the Collector is confused) is helpful.
Also, Justice is extremely effective against this entire box, but on Collector 1 in particular because he only has one main scheme. If you slap an Under Surveillance on there, it’ll give you even more room to work with. Do not underestimate the power of even one Under Surveillance in multiplayer, even if it doesn’t “scale.”
Additionally, you will want to make sure that you aren’t just killing every minion that comes out, as soon as it comes out. Sometimes you can soak minion damage with your hero without blocking. Sometimes you may need to use a high HP ally (like US Agent) to defend. On other occasions, you may need to swap to AE, let them thwart, or even stun/confuse them if you have a spare (Spider-Girl works great for this).
On expert, immediately take the three damage penalty for his when revealed Stage II effect to avoid losing a card to the collection turn one. You want to spend that momentum instead to build up or thwart off some threat from the schemes in play.
As a final expert tip, make sure you’re ready to push Collector to stage III. As soon as he flips, you’ll have to put a card from your deck into the collection, then place one threat on the main scheme for each card in there. That can automatically threat you out if you’re not careful.
I lied, here’s a final final tip. Remember that cards with “victory” points do not go in the collection! They go in the victory display.

The Collector: Escape the Museum
Key tech cards: High threat removal
The second go around with The Collector isn’t nearly as punishing. There is no collection tis time, you’re just going to have to take him out the old fashioned way: thwarting.
In this encounter, thwarting is the fastest way forward. You need to thwart out three main schemes to win. That’s it. If you manage to “kill” the Collector, who cannot be defeated, he’ll flip to his other side, you’ll remove three per player threat from the main scheme, and then he’ll flip back at the end of the round. Also, you can thwart off five threat from the library labyrinth environment by taking a facedown encounter card.
Okay, so there’s a lot going on, but the main takeaway is thwarting is king. It’s a lot of work to kill the Collector over and over, so you want to dedicate your main efforts to thwarting the main scheme directly. Similarly, Library of Labyrinth is very enticing, but you may not want to take an extra encounter card every turn. Just keep steadily thwarting off the main scheme in bulk and you’ll be part of the way through in no time.
Stay in hero as often as possible to prevent the main scheme from going up, as you don’t want to be thwarting off a small amount per turn, then have Collector undo your entire efforts.
Let the damage to Collector be incidental. Mechanics like Overkill will work, as well as damage from characters that have 0 or “-” thwart. If you happen to “defeat” and flip him for three per player threat, it’s a bonus. But don’t rely on it.
Once you get to stage 3A, the Library Labyrinth environment will go away and you’ll start to get blasted for two or three per player indirect damage across the table. Make sure you’re absolutely ready for this, because you can’t rely on Library of Labyrinth to win now.
Nebula
Key tech cards: Stuns, target acquired, the ability to heal or duck into alter-ego
Nebula is very much a cascading avalanche of an encounter. Sometimes she won’t feel as powerful. Sometimes she’ll have a ton of “technique” upgrades and wreck your day.
Here’s how she works. When Nebula activates, she fires off all of her “special” abilities on her techniques. These include: “place one threat on the main scheme, you are stunned, give Nebula a tough status card, take one damage, discard one card from your hand at random.” Afterward, you discard one technique (in Stage III, you need to remove the top card of your deck from the game to do it).
This creates numerous problems if she’s surging into multiple techniques, and they’re firing off constantly, and you’re only removing one per activation. It’s a smart move for the entire campaign, but bring at least one copy of Target Acquired to prevent her techniques from being attached to her via boost effect. Nebula is prone to being chump blocked. This is especially effective because it can keep the Power Stone on your hero.
She also has a ship at her disposal, which adds an “evasion counter” wrinkle in. When the villain phase starts up you add one evasion counter to her ship (as well as card effects that add them), and it dictates how much threat the main scheme increases by as a result. It’s very important to always keep Nebula’s Ship at zero evasion counters all game. It can quickly add up and in some cases, you may not be able to remove as many counters as you like, especially if you’re discarding cards and resources.
As a result, big-economy heroes who can afford to remove multiple evasion counters for the table are paramount here. And Nebula can be easier with more players in the mix, as the evasion counter increase is a flat one per villain phase.

Ronan
Key tech cards: Full card cancels, tough status for your hero
Thus far, Ronan is probably the toughest villain in the game. So naturally, we have a lot of tips!
If you’re playing campaign mode, let Nebula keep the stone at the very end, then take her out. This will help you with Ronan as he won’t be angry at you for having the stone, and you’ll deal with one less encounter card at the start.
Ronan’s main gimmick is that he starts with multiple side schemes in play if you’re running the campaign, and begins with the Kree Command Ship, which is a permanent hazard icon for the table. If you’re playing solo, you’re essentially playing heroic mode. Ronan also starts with his hammer, the “Universal Weapon.” In short, he’s already set up to wreck you, he doesn’t need multiple turns to do so.
Turn one you’re going to want to take his hammer away, full stop. Just take the damage and the encounter card cost, and treat it like you’re starting the game that way. It’ll remove Stalwart, and remove +1 SCH and +1 ATK from the equation. Stunning and confusing is crucial for Ronan, to prevent him from doing any damage. You’re going to want to stay on stage 1B for reasons I’ll explain in a moment.
So here’s the thing. You want Ronan to keep the Power Stone as much as possible; all game if you can. That way he doesn’t draw two boost cards, which can wreck your board state. Instead, ping him with packets of one or two damage, and use allies or non-attack abilities to prevent you from taking the stone back with the forced effect. The extra +1 ATK he gains from the stone is very small potatoes compared to a devastating additional boost.
Once he’s at Stage III in expert, or the Superior Tactics side scheme is out, you’ve trapped him. This forces him to keep the Power Stone until it’s removed, which lets you then nuke him down. If you drop to 2B, the main scheme prevents you from removing threat from it if Ronan has the Power Stone, which is a massive issue. Then this strategy of “letting him keep the Power Stone” is null and void, and you’ll have to also thwart out Superior Tactics, as well as any crisis icon side schemes. Do not drop to 2B.
The main card you’re going to need to watch out for is Fanaticism. To counter this card, you can opt to cancel it with options like Black Widow ally, or Spycraft. If it comes out (and it will in many cases), tough is a viable strategy. Wait, Fanaticism pierces, right? Well, sort of! If you have tough on your hero, and your ally is the target of the attack, the pierce hits your ally first, then overkill goes to your hero, which you can soak with tough. Always use the Milano to cancel a treachery if possible, as well. Good luck!
